


The Complete Guide On How To Image Mars (And Other Planets)
Planetary imaging is a fun and rewarding hobby that allows beginners and advanced amateur astronomers to delve into astronomical imaging without much of the expense and complexity of deep space astrophotography. There are also quite a few opportunities for planetary imagers to contribute to some significant scientific research. However, it is important to first understand what equipment is needed to successfully capture images of the solar system. In addition, some basic understanding of our atmosphere and optics are required, which will be addressed in this write-up.
Required Equipment:


Astronomy Software

Smartphone Adapter

There are several ways to capture planetary images. An easy way to capture Mars and other planets is with your phone using a smartphone adapter. Some people hold their phone to the eyepiece but using a smartphone adapter like the Celestron NexYZ will provide stability to capture clearer images.
Some folks have even recorded video frames with their phones and stacked them into images. The stacking of video frames is the ideal way to capture planetary images, but there are much better ways to accomplish this task. The use of a Canon DSLR camera coupled to a telescope while recording a 5x live view via EOS Camera Movie Record is an improvement, but still far from ideal.
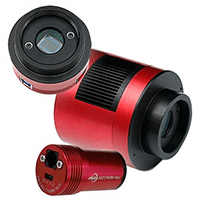
The best way to capture planetary images is with a relatively inexpensive dedicated planetary camera like those made by ZWOand The Imaging Source. These cameras are capable of recording very high frame rates and are available in different chips and pixel sizes to get the best possible resolution from your telescope.
Seeing Simulation

The reason you want to record high-speed videos of planets is to take advantage of the moments when the Earths atmosphere is most stable.
Remember the song, “Twinkle Twinkle Little Star?” This is a romanticized song about a very annoying phenomenon that astronomers deal with to some extent on a daily and nightly basis. The stars at night “twinkle” because of air currents of different temperatures, and consequently, differing densities mixing above our heads and bending that light erratically as it makes its way to our eyes or camera. This is known in sciency terms as “scintillation”. Astronomical Seeing is usually a rating from 1-5 or 1-10 of how good or bad the scintillation is predicted to be at any given hour; a 1 being the absolute worst seeing possible, making a planet look like a featureless shimmering ball of light through a telescope.
Keep in mind that just because it is a crystal clear night, doesn’t mean that it is a good night for planetary imaging. A good telltale is to look at a bright star about 20-30 degrees above the horizon. If the star is barely twinkling or not at all, that is a good time to run to your telescope and begin imaging as soon as possible. The seeing can sometimes change by the minute! By capturing images at a medium to high frame rate, and preferably the best seeing possible, you can take advantage of those fleeting moments that the atmosphere is the most stable, and put together enough images to make a sharp, noise-free image of a planet, that will make your friends think that you stole a NASA image.
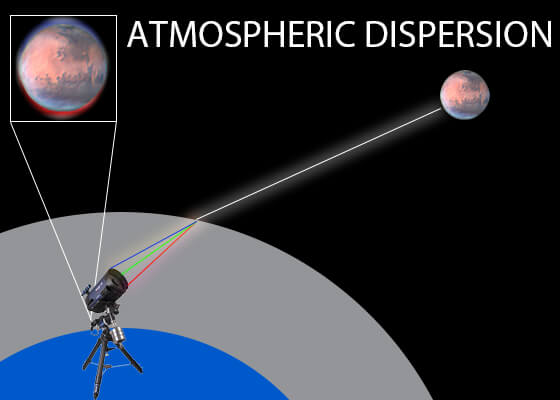
A final obstacle to overcome is something called atmospheric dispersion. For those of us residing in the northern hemisphere during the next decade, this phenomenon will have to be taken into account in order to capture high-quality images of Mars and Saturn. Atmospheric dispersion is a type of prismatic effect caused by the earth's atmosphere when observing planets and stars at altitudes between 10-50 degrees. As you look lower and lower towards the earth's horizon, you are looking through more atmosphere. This causes the light passing through the atmosphere to be broken apart into its red and blue components and softens the image of a planet the lower in altitude that you go. This problem can be corrected to an impressive degree through the use of a device called an Atmospheric Dispersion Corrector, better known as an ADC. This handy device uses two angled prisms that can be adjusted to shift that distorted light back to where it is supposed to be, creating a clear image.
In order to get the proper magnification of a planet, you will need a Barlow lens. They are available in several magnification factors ranging from 1.5x to 5x magnifications. To find the proper Barlow for your needs, there is a simple formula that you can use to find out what magnification will work best for your telescope and camera. It is as follows:
Optimal focal ratio = 5 x camera pixel size (in microns)
For a real-world example, the ZWO ASI 174 has a pixel size of 5.86 microns. So if we multiply that number by five, we get ideal the focal ratio of f/29. Now say that you have a f/10 SC telescope. If you were to use a 3X Barlow, putting the telescope at f/30, you would be close enough to f/29 to get the optimum resolution.
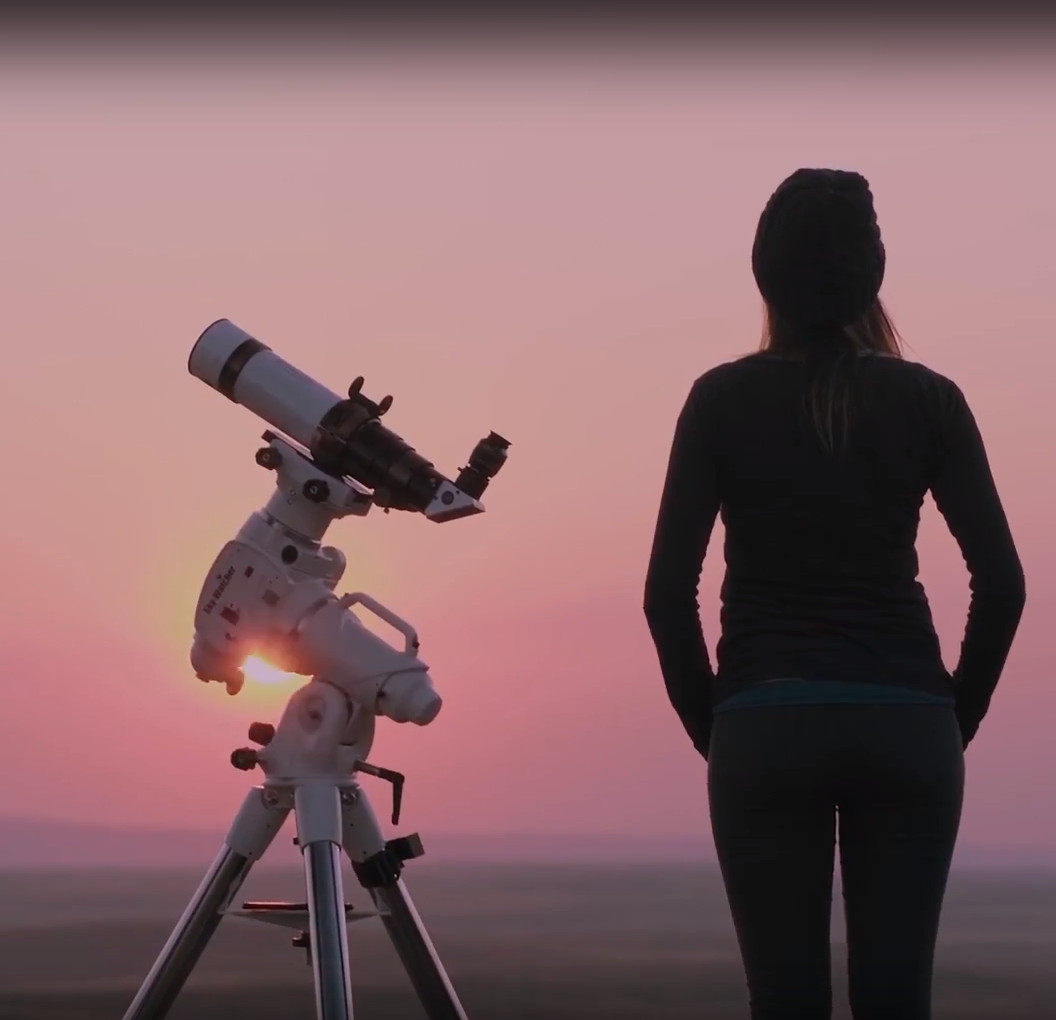
Just about any telescope will work for planetary imaging, but the most common telescopes that deliver the best results are apochromatic triplet refractors of 5 to 6-inches of aperture and Cassegrain telescopes of various designs, ranging from 6 to 20-inches in aperture size. Really, the larger the telescope, the better, but you will need increasingly good seeing the larger you go. It is also strongly recommended that you use an equatorial mount that is capable of tracking. An altitude/azimuth mount can be used, as well as an unmotorized mount, but this makes capturing images a very laborious chore, and limits what you can do.
With all of these things accounted for, it's time to actually begin imaging your target planet. When capturing videos, you will require a computer that is capable of recording, storing and processing an enormous amount of data. Naturally, this will require a computer that is of intermediate to high performance. We recommend a computer that has at the very least, the following specs:

Solid state hard drive with a capacity of at least 250GB

At Least 8GB of RAM
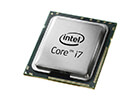
Core i7 processor or equivalent

NOT A MAC COMPUTER (very little support)
Setup and Capturing Images
It is very easy to capture 250 gigabytes of data in a good night of imaging, especially if the target is the Moon. A good program of choice is FireCapture. The layout is great, and it can also use the file naming convention that a program used for un-smearing planetary details allowing for much longer imaging runs on planets. To use just a color camera with FireCapture, here is what you need to do:
- Polar align your telescope the best that you can
It's not absolutely critical, but if you don’t you’ll be playing a very slow game of Pong in order to keep the planet in the frame, requiring all of your attention during the imaging run. - Achieve proper focus
You can focus on the planet itself and watch the edges, details, or moons (if applicable) become sharp. You can also focus on a nearby bright star, lock your mirror (if applicable) and slew back to the planet. Adjusting both the gain and shutter speed may be needed. - Set your exposure andTurn of gamma
These settings are experimentally determined by adjusting gain and shutter speed settings, but usually getting your histogram between 50 to 75% will work well. You always want to get your gain to be as low as possible and a shutter speed that is reasonably fast. 30 to 60fps in very good seeing and 70-Max fps in average to below average seeing. - Tune your ADC
Click debayer check box, and ADC tuning check box, and adjust until both red and blue get as close to making a white circle as possible. When tuned, uncheck both boxes so your image is black and white again. Otherwise, you’ll be wondering why your camera only maxes out at 5fps. You must capture data in B&W so you can get to max fps. - Set video duration time depending on how fast the planet rotates.
- For Mercury, doesn’t matter. Extremely slow rotation
- For Venus, 300 seconds is fine
- For Mars, 180 to 240 seconds works fine
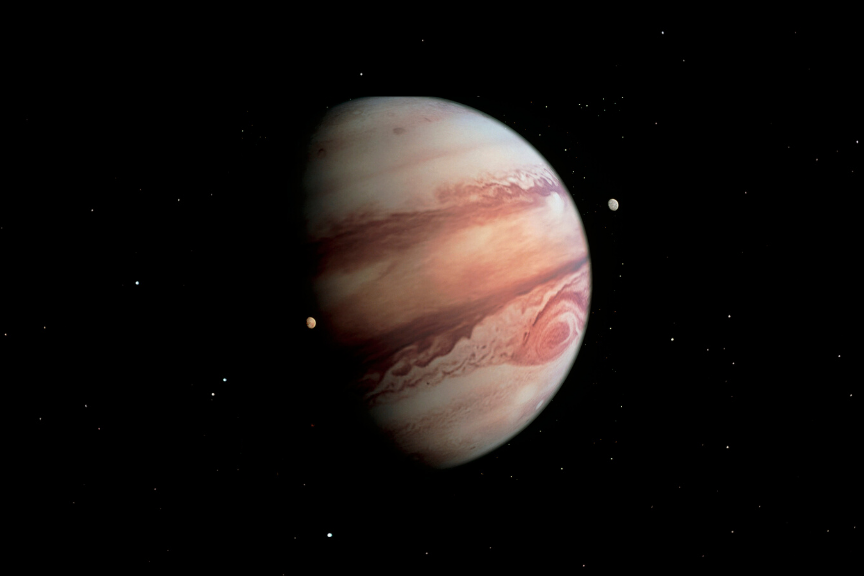
- For Jupiter, 30-60 seconds works but is somewhat conservative. I’ve gotten away with 120sec
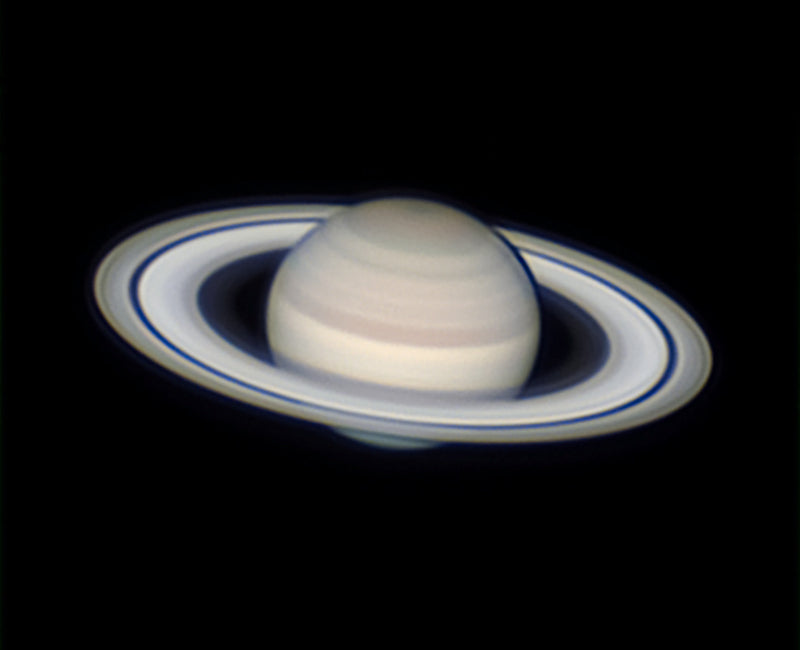
- For Saturn, 180 to 240 seconds works. Usually not small fine details like storms visible
- For Uranus, 300 seconds works
- For Neptune, 300-750 seconds works
- Use .ser files not .avi
Image Processing
Finally, with our recorded data, we can process our images. The gold standard software programs for processing planetary images are Autostakkert! and Registax.
You can open Autostakkert! and add your video files one at a time or all at once if they are of the same target and binning. The parameters for achieving the ideal stacked image are experimentally determined in both of these programs, but here are some tips:
For Autostakkert!

- Keep the center of alignment points away from the edges of the planet where distortion is most noticeable and will confuse the alignment process.
- You want to stack at least 50% of the frames. 75% is ideal.
- Keep your Noise Robust setting at 2 or 3 unless the images are horribly noisy.
- Check the box for double stack reference.
- Autodetect for color videos sometimes doesn’t work, so under the color tab, click on Force Bayer RGGB. This one works 99% of the time. If it doesn’t, you’ve either got a different Bayer pattern or your camera needs a UV/IR block filter.
- Never save a file as a jpeg unless it is a copy of your final image that is going on the internet.

For Registax
- Use Registax for Wavelet processing only.
- Play around with the wavelet settings. Usually, the first three are the ones you need to adjust. Wavelets 1-6 go from finest detail sharpening to large detail sharpening.
- There are some instances that you have to peg all the wavelet settings to max.
- Play with the Dyadic settings. Be warned, they are far more sensitive to adjustments.
- Don’t overcook it, overcook it is no good.


Timothy Lindley
September 24, 2020
Thanks, I’m a little green at this and you have just helped me with at least 5 issues. Appreciate you taking the time to jot this down. Infantryman In Kentucky